Sowing Orchid Seeds

Disinfection and sowing seeds
1- Preparation disinfectant
1) Calcium Hypochlorite is unstable, corrosive and chlorine which can cause severe burns. So handle with care. Because of its instability, is prepared just before use.
2) Weigh 5 grams of calcium hypochlorite
Hypochlorite dissolve with 100 ml of water. The goal is to create a solution saturated, so it is normal that undissolved residue remaining in the bottom of the container. Shake the mixture regularly for about ten minutes and then allow to settle for another ten minutes.
Then pour the liquid into the funnel in which you will put a coffee filter, trying not to cause too much deposit it.
3) The hypochlorite solution is usable for a few hours at room temperature. Stored in the fridge in a sealed container, away from air and light, it will keep for several days.
2- Sterilization of seeds
A syringe (recommended for beginners)
1) Place a small amount of seeds in your syringe and empty the excess air
2) Draw your Calcium Hypochlorite solution using a syringe and shake there for 5 minutes (see variable time low in the protocol description)
3) After the elapsed time, place a cotton on the tip of your syringe and slowly empty out the seeds remain at the end of the syringe, the light suction will recede.
4) Aspirate sterile water therewith to rinse your seeds, then with another cotton, repeat the previous emptying operation. Repeat if necessary.
5) Once your rinse is done, suck 10ml of sterile water with your syringe and then place the cotton soak calcium hypochlorite after the syringe to avoid contamination.
The glass tube
a) placing a quantity of seeds equal to the size of two grains of rice in a test tube.
b) Half fill the tube with the previous prepared calcium hypochlorite solution.
c) Hold the tube between your thumb and forefinger, so clog the pipe end with a finger. Start timer for 5 minutes regularly shaking the tube.
d) After 4 minutes, hold the sealed tube in a vertical position, opening down. In the remaining minute, the seeds will rise slowly to the surface of the liquid.
e) When the 5 minutes are up, remove your finger suddenly opening: the liquid will flow and the seeds will remain stuck along the tube wall. Put a cotton ball and place the tube in the glove-box
3- Disinfection glove box
Equipment required:
- A glove box
- Latex gloves (optional)
- A bleach solution 2.5%
- The windscreen leaves everything
- Spray
Step 1:
pour into a spray your bleach solution 2.5% and a few drops of dishwashing liquid. close it, shake and let stand 2 to 3 minutes.
Step 2:
Spray with a little partimonie Javelisée your solution in your glove box. Arrange some paper towel sheets deep in your Glove box so that objects do not slip during your manipulations within the box.
Step 3:
Gather all the items you will need for your manipulations, sprinkle them with your Javelisser solution now well on the slots / recesses and arrange them in your glove box.
Step 4:
Once all relevant objects in your glove box, re-sprinkle them again now well on all of your mailbox, and then place the lid and wait 30 to 40 minutes without opening
You can place your hands into the gloves in place, putting latex gloves more if needed and work in a sterile area. Always remember to make slow and precise movements.
4- Sowing - After sterilization of the glove-box
1) Take the container that will host your seeds and your previously sterilized syringe containing your seeds.
2) Open the container, remove the cotton tip of the syringe and rapid pressure to expel the contents of the syringe after emptying the excess sterile water in your culture medium and then close your container.
3) If you opt for planting in the glass tube, collect the seeds using a spatula and spread them out on the agar surface.
4) Once your seedlings, be sure to close your container. Open the glove-box, remove the container and shoot it with cellophane. Place it in your grow room.
Do not forget to identify your seedlings using labels or markers.
Sterilization time:
Epiphytic or terrestrial: Calcium hypochlorite for 5 minutes
Vandae or Paphiopedilum: Calcium Hypochlorite for 6 minutes
Phalaenopsis: Hydrogen peroxide 10 Volumes modified for 6mn
Sowing "Green"
If you know at what time your cap off, you can perform this technique. The capsule must be closed so the interior will still sterile which will greatly increase the chances of germination.
1- Detach the capsule of the plant
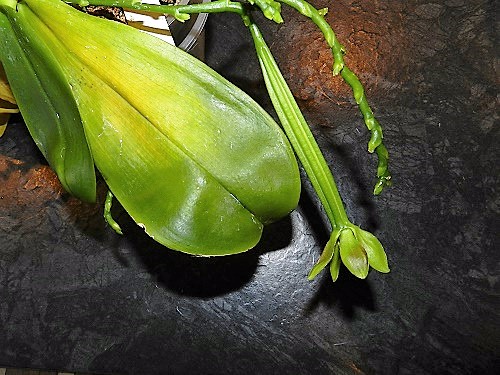
2- cut the leaves
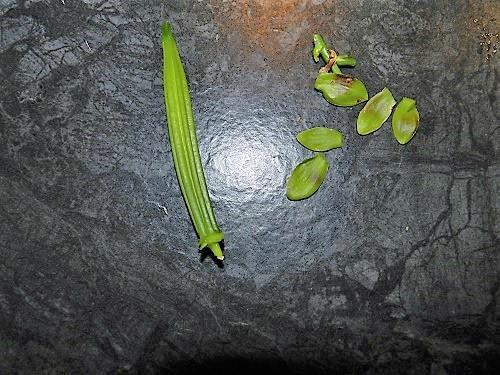
3- Place your clove in a sealed container with disinfectant (e.g., 10% hypochlorite + 1 drop of dish soap), and let it sit for at least 10 minutes, stirring occasionally
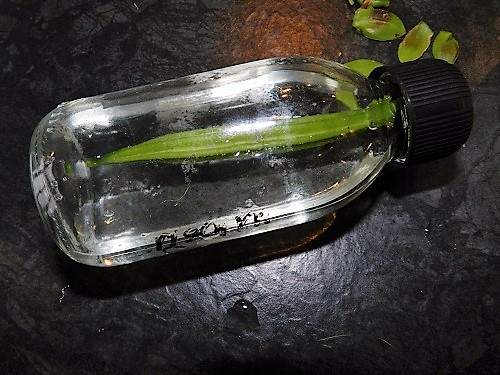
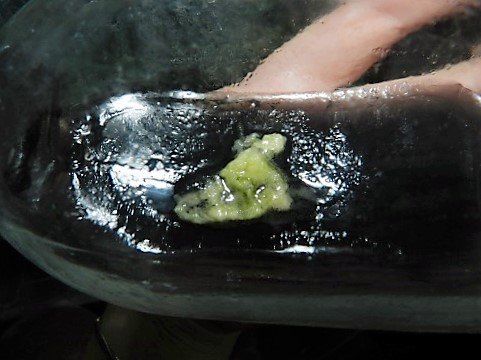
4- You can then place your container in your sterile working area (glove box) and then with a scalpel, open full length and extract the seeds to sow them directly.

Once well advanced, it will move to transplanting.
Laisser un commentaire